Help:Databases
We are building a collection of pages about other websites that may be useful to E. coli researchers. This is a guide on how to update your wiki page.
Contents
Getting Started
Logging In
- Click "Login" in the top right corner.
Finding Your Website
- Go to Category:Databases
- Click on "EcoliWiki Page"
Editing and Saving
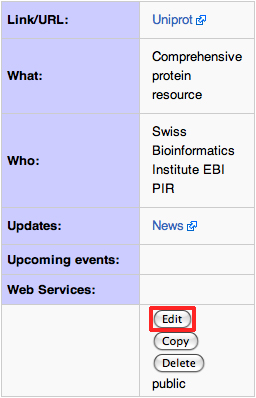
- Click "Edit"
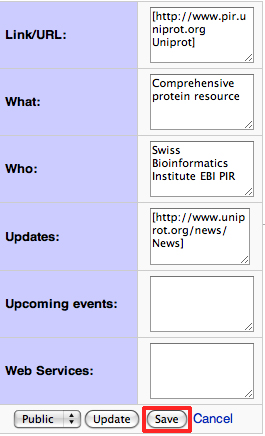
- Click "Save"
Links
Internal Links
To link to another EcoliWiki page, put the name of the page inside a pair of brackets.
 INPUT: [[What's new?]]
OUTPUT: What's new?
External Links
To link to another webpage using the raw URL:
 INPUT: http://example.com
OUTPUT: http://example.com
To link to another webpage using specific text you will type [URL text].
 INPUT: [http://ecoliwiki.org EcoliWiki home page]
OUTPUT: EcoliWiki home page
Italics, Bold, and Bold Italics
| italics | ''italics'' Text is surrounded by two single quote (') marks on each side. |
| bold | '''bold''' Text is surrounded by three single quote (') marks on each side. |
| bold italics | '''''bold italics''''' Text is surrounded by five (three for bold, two for italics) single quote (') marks on each side. |
| 'italicized single quoted' | '' 'italicized single quoted' '' Put a blank space in between the marks for italics and the single quotes you want to appear in the text. |
Indenting
|
To indent a block of text, use a colon (:) like this: | |
| Markup | Gives on the page: |
|---|---|
:Level 1 ::Level 2 :::Level 3 |
|
Lists
BulletedUse * to start each line. Different numbers of *s give different levels of nesting. | |
| Markup | Gives on the page: |
|---|---|
*item *item **item **item *item **item ***item *item |
|
NumberedUse # to start each line. Different numbers of #s give different levels of nesting. | |
| Markup | Gives on the page: |
|---|---|
#item #item ##item ##item #item ##item ###item #item |
|
More list examples | |
| Markup | Gives on the page: |
|---|---|
Indent the whole list
:*Item 1 :*Item 2 :**Item 2.1 :*Item 3 |
|
Mix types w/continuation
#Item 1 has an embedded numbered list ##Item 1.1 ##Item 1.2 #:and then item 1 continues #Item 2 ##Item 2.1 has an embedded bulleted list ##*2.1.1 ##*2.1.2 ##:before it continues ##Item 2.2 |
|
Images
Uploading
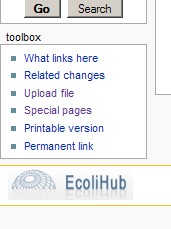
Once you're logged in, there will be a toolbox on the left-hand side of the page. In it will be an Upload file link. If you can't find it, click here to upload the file.
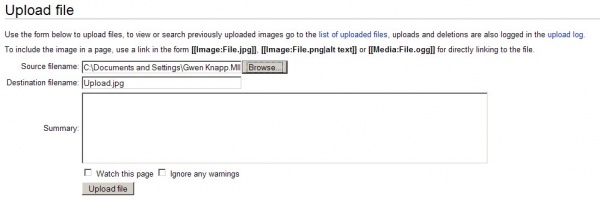
Once you have clicked Upload file, you'll be taken to a page similar to this:
To upload an image on your computer, click Browse and locate the file of interest. If you want, write a brief summary about the image. Once you've located the file, click the Upload File button.
If all goes well, you'll be taken to a page that shows the image. One error you might get is that a file is larger then the recommended file size. You can try and resize your image on the computer, then re-upload the file.
Image Syntax
To add an image, use:
- [[Image:ImageFileName|{type}|{location}|{size}|{caption}]]
{type}, {location}, {size}, and {caption} are all optional. Anything that is not recognizable as {type} {location} or {size} is treated as a caption.
- type: allowed values are 'thumb', 'thumbnail' or 'frame'. If this is left blank, there is no box around the image, and it doesn't display a caption
- location: allowed values are 'right', 'left', 'center' or 'none'. Text will wrap around 'left' or 'right' but not around 'center'. Use {{Clr}} to prevent text below from wrapping.
- size:{width}px width in pixels. Ignored if type is 'frame'.
Using Images
Using the name you uploaded your picture as, type:
 INPUT: [[Image:logo.jpg]]
Align the picture to the center, left or right of the page:
 INPUT: [[Image:logo.jpg|center]]
Make the picture have a thumbnail and a caption
 INPUT: [[Image:logo.jpg|thumb|right|50px|Caption goes here]]
Tables
Information Table
- Click "Edit Table"
- Click "Edit" and type any new information in.
- Click "Save"
- Click "Save table to wiki page" so the table changes get saved back to the original page.


